Hi! Welcome to my blog. I am a major foodie, with a haphazard cooking philosophy, currently making that transition from cooking and baking for friends and family to 'wonder if I could make this my career'. Follow me for recipes, the outcomes of a few experiments, and general lovely foodiness. Opinions, reviews and recommendations are all my own.

Monday 25 February 2013

Honey, Fruit and Nut Flapjacks

I think everyone has a handful of easy recipes that they make over and over again because they are simple and they taste good. They become a weekly feature in the home, and almost a habit for the baker, until one weekend, you forget, or have commitments that prevent you from making that regular batch, and suddenly you break the habit and don't have any for ages. Chocolate Brownies are one of mine, and Flapjack is another.

Honey, Fruit and Nut Flapjacks
I adore flapjack for its simplicity, a few ingredients in a bowl, bake it and done, and also because it just about convinces me that I'm taking a healthy choice over cake or pudding... ok, I said just about! 

I particularly like this recipe for two reasons, one because I have adapted it over time to have the easiest list of ingredients and quantities to remember by heart, and secondly because of the use of honey rather than golden syrup, which gives the flapjack a really subtle flowery taste rather than sticky sweet. (You could always directly replace the honey for golden syrup if you wished however.)

The Recipe

100 grams butter
100 ml honey
100 grams golden caster sugar
200 grams rolled or porridge oats
100 grams mixed fruit and nuts (I have used chopped hazelnuts, dried apricots, mango and pineapple, and glace cherries here, - but feel free to mix up to your tastes with this - you could have lots of flavours like me, or keep it simple with one or two key ingredients)

Makes 16 square flapjacks, or 8 breakfast bars.

To make the flapjacks, line a 20 cm square tin with baking parchment and grease well. 

Put the butter, honey and caster sugar in a saucepan, and heat until the butter and sugar are melted and then stir all the ingredients until well combined.


Meanwhile put the rolled oats, fruit and nuts into a large bowl and stir together. Pour over the butter and honey mixture, and stir well until all of the oats and fruit are coated. 


Transfer the mixture to the lined tin, and spread evenly, pushing the mixture into the corners and pressing down flat with the back of a spoon or spatula. 


Bake in the oven at 180 degrees for 15 minutes, or until lightly golden on top. Avoid letting the edges burn.


Remove from the oven, and place on a cooling rack still in the tin. Leave to cool for 3-4 minutes, and then whilst the mixture is still warm, use a pallet knife to slice the flapjacks into the sizes required. 


Leave in the tin to cool completely, then lift out of the tin using the baking parchment. You may need to re-cut the slices here with a knife, by just cutting through the marks made with the pallet knife. 


Flapjacks will keep well in an airtight tin for 7-10 days... not that they have ever lasted that long in our house...


Saturday 23 February 2013

Chicken and Leek Pie, and a Productive Day

Today I honestly feel I could rival Anthea Turner for her Good Housewife crown. In no particular order, I have done the biggest of big shops you could imagine, cleaned the oven (urgh), made two lasagnas to freeze, a batch of gorgeous Honey, Fruit and Nut Flapjacks (recipe to follow soon), portioned out meat and veg to freeze, and beeswaxed the furniture... phew! Then I made these Chicken and Leek Pies, one large one for dinner, and four smaller to freeze for Gary for later in the week. (my pie crust was a little thin on the large one - forgive me the cracked top, it still tastes delicious I promise!)

Chicken and Leek Pie
I never made any new years resolutions this year, but I am trying to be better at budgeting and less wasteful, both of money and food. In our house we are notoriously bad a portion control. I often buy meat to freeze, however when we defrost we wind up eating more in order not to waste it. Now I try to pre-portion meat into freezer bags, for example, if we buy a pack of four chicken breasts, I will separate them into two lots of two, then we only need to defrost what we need. Lately, I have extended this to fresh vegetables. Again, I prep, portion, bag and freeze, and then we can just take out what we need when we need it, and it saves me from that horribly guilty feeling of throwing out bad food at the end of each week. 

Anyway, back to my pies... I made these from fresh chicken, and a chicken stock cube, however they would work equally well, if not better, from leftover roast dinner meat and fresh stock from the carcass. The quantities here made one 8 inch pie and four 4 inch pies, but would equally make 2 8 inch or one large pie. 

Here goes,

For the shortcrust pastry

300 grams plain flour
150 grams butter, cubed
120 ml cold water
1 egg, beaten

For the Chicken and Leek filling

400g chicken, uncooked or leftover will work equally, cut into pieces
1 teaspoon thyme
1 teaspoon rosemary
Small glass of white wine
2 leeks, sliced
1 litre chicken stock, either fresh or from a stock cube
3 medium carrots, diced
8 large mushrooms, diced
2 tablespoons double cream
3 teaspoons cornflour

Pre-heat the oven to 180 degrees.

To make the pastry, sift the flour into a large bowl, and mix in the salt. Cube the butter and rub into the flour to produce a fine crumb like texture. Add the water a tbsp at a time. I have quite warm hands, so use a fork for this stage to stir the water through the mixture, and add a small amount at a time until the pastry starts to ball up. I usually do not have to use the full amount of the water. Once the pastry starts to ball, use your hands to gather the mixture together and shape the dough into a ball.

Wrap the ball in cling film and place in the fridge. 

Take a large saucepan. Heat a little oil until hot, then add the chicken and the herbs. Cook for a couple of minutes to brown the meat, then pour in the white wine and stir well. Add the leeks, and allow to soften. Meanwhile, make up the stock if you are using a stock cube.

Add the stock to the pan, along with the remainder of the vegetables. Turn down the heat, and simmer for 30 minutes, until the chicken is well cooked. 

Finally, add the double cream and stir well. To thicken the sauce, mix the cornflour with a little water, and add in three stages, stirring each time to check how thick the sauce is getting. Remove from the heat and set aside. 


Take the pastry from the fridge, take half, and roll out on a lightly floured surface, to around 3mm thick. Transfer the pastry to a pie dish using your rolling pin. Gently press the pastry into the corners of the dish, then trim the excess. 


Line the dishes with foil and blind bake the pastry for 10 minutes, remove the foil, and bake for a further 5 minutes. 

Remove the dishes from the oven. Fill each of the pies with the chicken filling, and brush the edges of the pastry case with the beaten egg. Roll out the remaining pastry and make a lid for the pie by transferring the pastry to the top of the pie, pressing the edges lightly to join the egg-brushed edges, and trim the excess. Make a small slit in the top, and brush all over with the egg wash. 


Bake for 25 minutes until the pie crust is golden. Remove from the oven, and serve. We ate ours with crispy roast potatoes... delish! 


Wednesday 20 February 2013

Congress Tarts

Tonight I wanted to share this recipe for Congress Tarts, as it is something that I make quite often at home just as a day-to-day bake. Gary asked me to make them many years ago, as they are something he remembers fondly from his childhood as a treat that his Mum used to make, I personally had never heard of them, but none-the-less can confirm that they are delicious! Somewhat of a cross between a macaroon (of the English coconut-y variety, not French) and a Bakewell Tart is probably the best way to describe them. I wonder how many other people are out there like me who have never heard of these classically British tea time treats - you are missing out if you are one of them... trust me.

Congress Tarts
Ingredients

For the shortcrust pastry;
  • 250g plain flour
  • 125g butter
  • pinch of salt
  • 100ml ice cold water

For the filling;
  • 225g golden caster sugar
  • 225g ground almonds
  • 1 1/2 tbsp semolina
  • 3 egg whites
  • 60g dessicated coconut
  • 1/2 teaspoon almond essence
  • zest of one lemon
  • 4 tbsp raspberry jam
Pre-heat the oven to 180 degrees and lightly grease a 12 hole muffin tin.

To make the pastry, sift the flour into a large bowl, and mix in the salt. Cube the butter and rub into the flour to produce a fine crumb like texture. Add the water a tbsp at a time. I have quite warm hands, so use a fork for this stage to stir the water through the mixture, and add a small amount at a time until the pastry starts to ball up. I usually do not have to use the full amount of the water. Once the pastry starts to ball, use your hands to gather the mixture together and shape the dough into a ball.
Roll out the dough, and cut out circles to line each of the holes in the muffin pan. Place in the fridge for 30 minutes.

Remove the pastry from the fridge and spread the raspberry jam between each of the tarts.


In a large bowl, combine the sugar, ground almonds and semolina. Whisk the egg whites until white and fluffy but still runny. Pour into the almond mixture. Add the coconut, lemon zest and almond essence and mix well.

Take a spoonful of the mixture at a time,, shape it into a ball, and press into a pastry tart.


Place in the oven and bake for 15 - 20 minutes, until golden brown on top, and the pastry is cooked underneath. Remove from the oven, and release the tarts from the tin and place on a cooling rack.


Enjoy these little treats with a hot cup of tea. The almond-y coconut macaroon filling will be crisp on top, but light and chewy in the middle, sitting on top of the sweet layer of raspberry jam, and all encased in a golden shortcrust pastry. A perfect snack for elevenses... or afternoon tea... or when you get in from school/work... or a midnight snack... heck, they'll do just about anytime! 

Monday 18 February 2013

Honey and Ginger Bundt Cake

I decided to make a cake for my Grandpa's birthday this weekend, as the family were all having a get together on Saturday to celebrate. I love the 'get togethers' that we have in our family - they remind me of such happy childhood times - my grandparents have a gorgeous farmstead between Derbyshire and Sheffield, and my childhood was filled with walks in the countryside, summer days 'helping' bring in the hay, and big meals surrounded by aunties and uncles, pets, and cousins. Sadly they don't happen as often now as they used to, and with my generation now all in our twenties and scattered across the country, it is rare that everyone is in the same place at the same time. 

'Honey to the Bee' Honey and Ginger Bundt
When I came to deciding what cake to make for this occasion, I decided I wanted to create something that represented my Grandpa, rather than going all out with fancy icing and decoration, which I knew he wouldn't appreciate. I knew that this cake therefore had to be about taste, rather than style. I must also add that my Grandpa was a baker, and a cook in the armed forces during the war, so knows a thing or two about a good bake. No pressure then. 

Now I do know that he is partial to a little ginger from time to time, and equally that he always takes his tea with honey, not sugar, so when I stumbled upon this gorgeous Honey and Ginger Bundt recipe on Dolly Bakes blog during a late night browsing session, I knew it was meant to be!

I have added the recipe below, and made no variations - full credit to Rachel at Dolly Bakes - the cake went down a treat, everyone loved it, including my youngest cousin who, at the age of 11, I thought might not appreciate the ginger taste. My Uncle was straight up for second helpings, closely followed by my Mum - which is unheard of! My Grandpa complimented the moistness of the cake contrasted with the slightly crisp edges, and said that there was 'just enough' sweetness with the glacé icing and honey drizzle. And of course, everyone loved the fondant bees! They make me smile whenever I look at them! 


To make the bees, colour a small amount of fondant or marzipan to a pale orange colour. Break of a grape sized amount, roll into a ball, and then squash to a more oblong shape. Melt a small amount of dark chocolate, and pipe over the bee bodies in lines. Press two even sized flaked almonds into the body to make the wings whilst the chocolate is still setting, to avoid it cracking. Finally, using a cocktail stick dipped in brown food colouring draw on the eyes and mouth.


Ingredients:
  • 225g butter
  • 450g golden caster sugar
  • 4 medium eggs
  • 350g plain flour
  • 4 tsp ground ginger
  • 1 tsp mixed spice
  • 1/2 tsp bicarbonate of soda
  • 1/2 tsp salt
  • 200ml thick honey flavoured yogurt 
  • 50ml local honey
  • 100g crystallised ginger cut into small chunks and tossed in flour

To make the cake, pre-heat the oven to 160 degrees. Grease the bundt tin, and sift a little flour in. This is to help easy release of the cake from the tin. (On an aside - I only have one bundt tin at the moment, which is a springform universal tin, much easier for removing the cake, but probably frowned upon by the bundt experts!)


Soften the butter, then cream in the sugar a stage at a time. Then beat in the eggs one at a time.


Combine the flour, mixed spice, ground ginger, salt and bicarb of soda into a large bowl.


Measure the yoghurt and honey into a jug, and mix. Then add a third of the dry mix to the butter and eggs, followed by half of the yoghurt and honey. Another third of the dry mix, the remainder of the liquid, and then the remaining dry ingredients, and fold gently. 


Finally add the ginger tossed in flour - coating the ginger pieces in flour helps to keep them dispersed throughout the cake, rather than all sinking to the bottom of the tin. 


Place in the oven and bake for an hour and 15 minutes, or until a skewer inserted comes out clean. Take out of the oven and leave to cool in the tin for 10 minutes before turning out onto a cooling rack. 


This cake would be delicious served as it comes, however as mine was for a birthday cake I added a little decoration. I mixed some icing sugar with water to form a glace icing, and poured it over the cake allowing it to run down the sides in a natural way. I drizzled a little honey over the top of the icing, and then arranged my fondant bees and a few sugarpaste blossoms across the top. 


Saturday 16 February 2013

Minced Beef Pie: A Real Kick at the Pantry Door!

Looking out of the window today, it's hard to believe that only 48 hours ago, there was snow on the ground. The weather the last few weeks has been somewhat unpredictable, from snow to rain to clear skies and back again - I don't think I remember a time when snowstorm follows snowstorm in the way it has this year. Anyway, on one such evening last week, when the snow was coming down, and Gary and I were trying to come to some compromise over who would brave the weather to get to the supermarket, desperation to keep warm led me to the freezer to see whether there was anything that could be salvaged to form a meal. 

I came up with this Minced Beef and Vegetable Pie, which we had with some leftover oven chips and onion rings. I was very pleasantly surprised by the taste and how well the whole pie held together, so thought I would share it with you all!

Minced Beef Pie

These are the ingredients I used, this made one large pie, plus two smaller pies which Gary had for lunch over the following days. It is really a case of using up what is available, so feel free to add or omit ingredients from the beef mixture as necessary...

For the shortcrust pastry
  • 250g plain flour
  • 125g butter
  • pinch of salt
  • 100ml ice cold water
  • 1 egg, beaten 
For the Minced Beef filling
  • 1 tsp sunflower oil
  • 500g lean minced beef
  • 1 tsp thyme
  • 1 tsp rosemary
  • 1 Knorr Beef stock cube
  • 2 serving packets Bird's Eye frozen mixed vegetables (mixed peas, carrots and brocolli) 
  • 1 tin Broad Beans, drained
  • 100ml beef gravy made from instant gravy mix
Pre-heat the oven to 180 degrees and lightly grease a pie dish.

To make the pastry, sift the flour into a large bowl, and mix in the salt. Cube the butter and rub into the flour to produce a fine crumb like texture. Add the water a tbsp at a time. I have quite warm hands, so use a fork for this stage to stir the water through the mixture, and add a small amount at a time until the pastry starts to ball up. I usually do not have to use the full amount of the water. Once the pastry starts to ball, use your hands to gather the mixture together and shape the dough into a ball. Wrap the dough in clingfilm and refridgerate for 30 minutes. 

Meanwhile, in a large saucepan, heat the oil, and then add the minced beef to brown the meat. Add the herbs and stock cube and stir well. Once the meat is fully cooked, reduce the heat, and add the vegetables straight from the freezer, and the broad beans. Stir well. Finally, once the vegetables have warmed through, make up the instant gravy, and add to the pan. Place a lid over the pan and simmer on a low heat whilst you blind bake the pastry.

Split the dough into two halves, wrap one half in clingfilm and place back in the fridge. Roll out the pastry to around 5mm thick, and transfer to the pie dish. Press the pastry into the corners and ridges of the dish, and then trim off any excess. Cover the pastry with a sheet of foil, and place in the oven for 15 minutes to blind bake - so we can avoid any soggy bottoms! After 15 minutes, remove the foil, and return to the oven for a further 5 minutes to crisp up.

Remove the pastry from the oven, and spoon in the minced beef mixture. Roll out the remaining pastry to make the lid. Using a pastry brush, brush some of the beaten egg around the edges of the pie bottom. Transfer the pastry for the lid over the top of the dish, and press the edges onto the edges brushed with egg to make a join. Trim of any excess, and make a small slit in the centre to allow any steam to escape. 

Brush the top of the pastry with the beaten egg, and place in the oven for a further 15 - 20 minutes until golden brown. 

Serve, and enjoy! 
Minced Beef Pie and Chips
I am entering this recipe into Credit Crunch Munch hosted by Camilla at Fab Food 4 All, and Helen at No Fuss Flavours, as it was made entirely from leftover ingredients found in my cupboard and freezer, and can be adapted to suit anything that needs using up. 


Friday 15 February 2013

Valentine's Day Black Forest Chocolate Cherry Cake

I am so excited to share this recipe and cake creation with you all, as I have had it mentally drawn up in the back of my mind for Valentine's Day for the last few weeks! It was actually baked for Valentine's Day, however I have had to wait until today to post it, as there is a hidden surprise inside and of course, it needed to be photographed! 

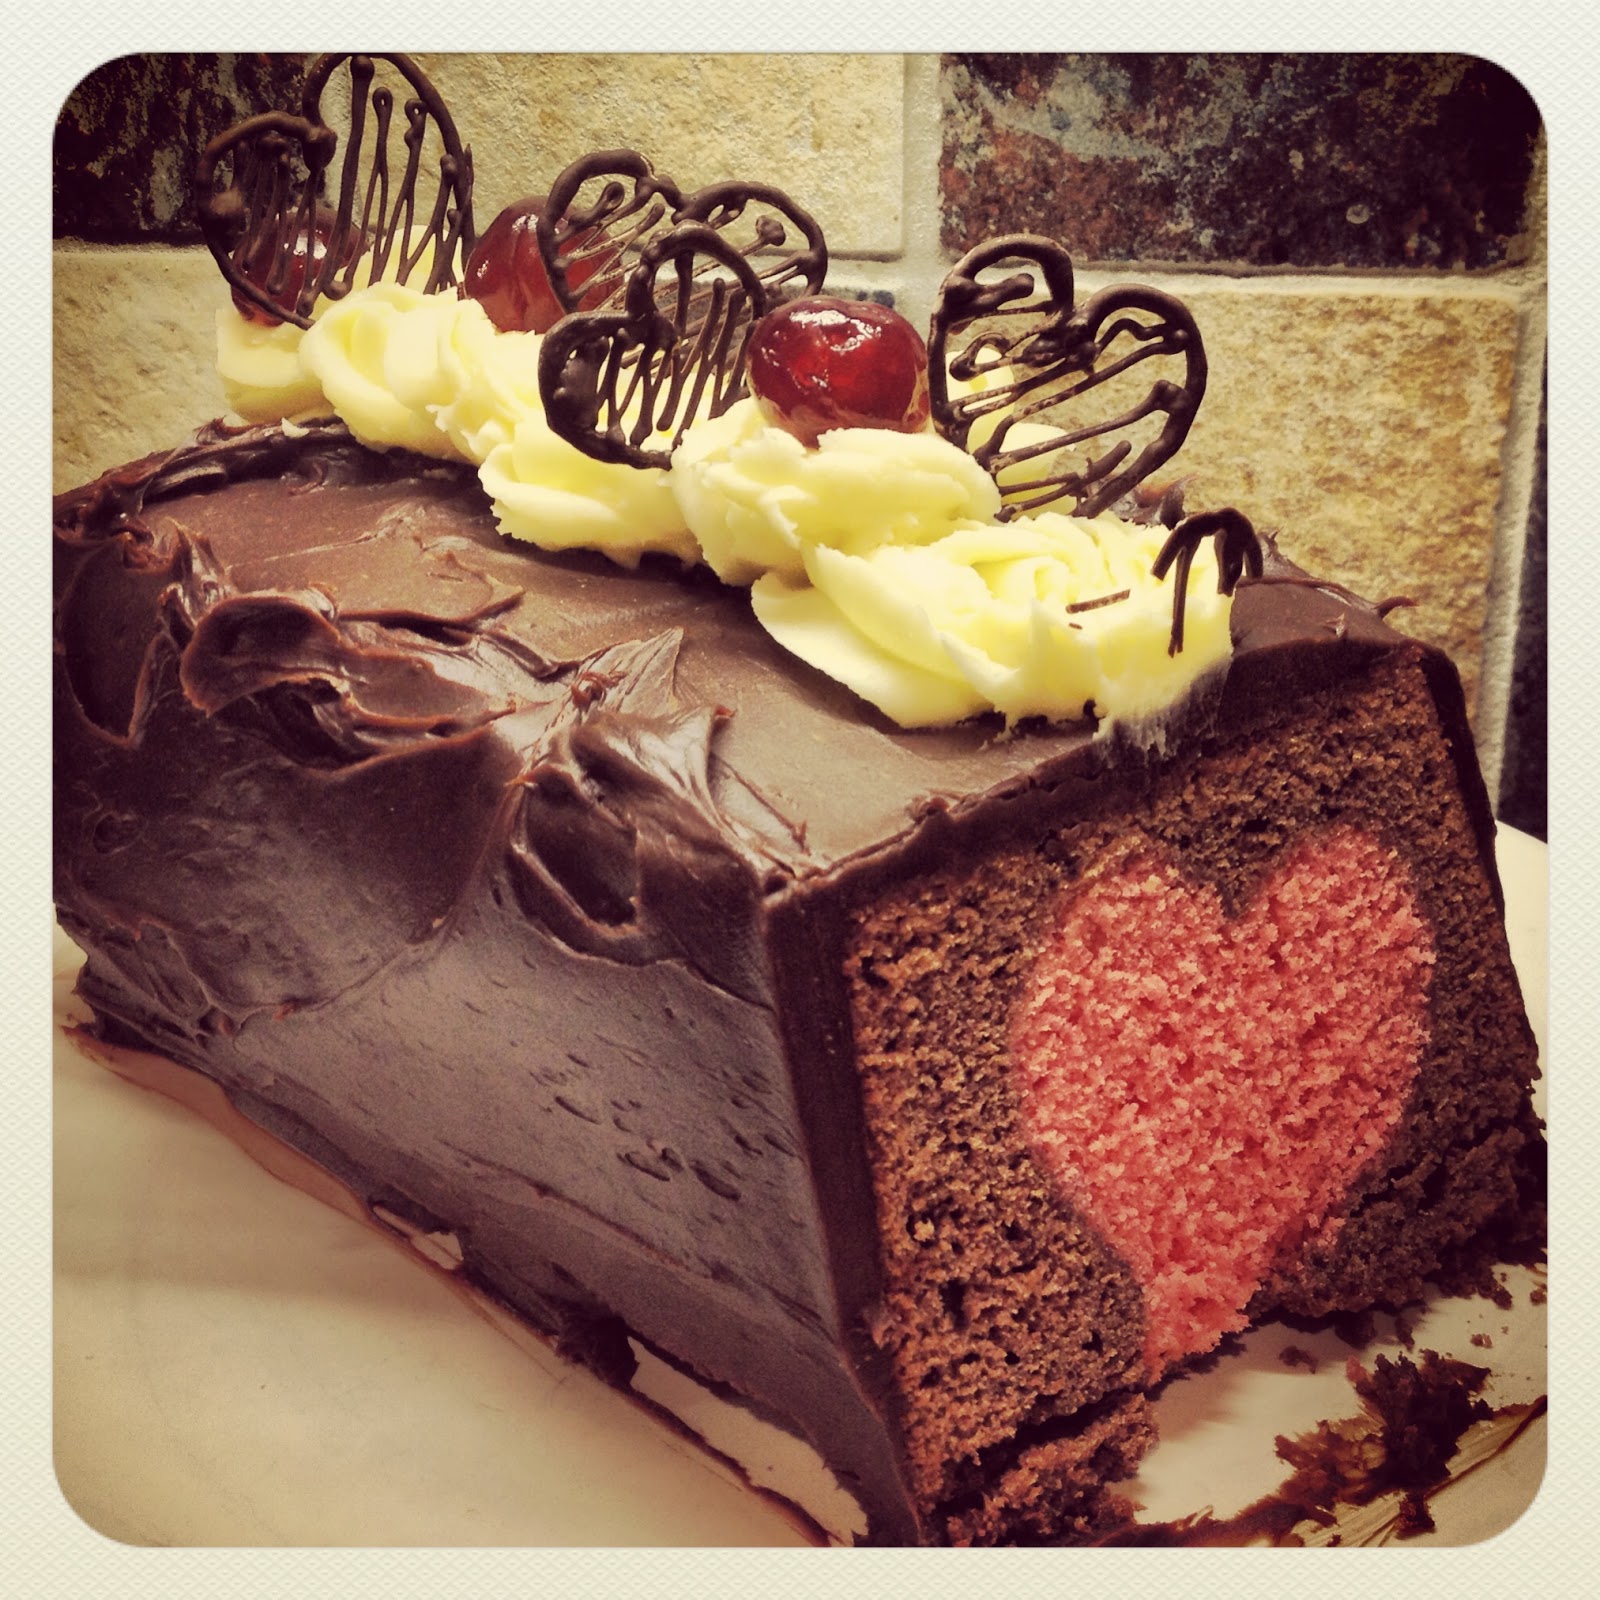
This is my Black Forest Chocolate Cherry Cake, with Cherry Brandy Ganache, Buttercream Roses and Dark Chocolate Hearts - an absolute feast for the eyes and the taste buds for Valentine's Day...

'Black Forest' Chocolate Cherry Cake ...
... and it hides it's own little secret - a bright pink Cherry heart!!

... with a hidden pink heart!
The flavours in this cake are inspired by the great classic Black Forest Gateaux, but with a few changes and twists in order to meet the design I had in mind. This cake is best made the day before needed as the ganache needs time to set before the remainder of the decorations are added. To recreate this gorgeous cake, you will need the following ingredients;

For the Pink Cherry Heart
  • 100g butter
  • 100g golden caster sugar
  • 2 free range eggs
  • 1 teaspoon either cherry brandy or cherry extract
  • 100g self raising flour
  • Pink or red food colouring (I used Sugarflair gel in Ruby)

For the Chocolate Sponge
  • 150g butter
  • 150g golden caster sugar
  • 3 free range eggs
  • 100g self raising flour
  • 20g good quality cocoa powder (I used Green & Blacks here)

For the Cherry Brandy Ganache
  • 200g good quality dark chocolate
  • 200g double cream
  • 1 teaspoon cherry brandy
For the Buttercream
  • 70g icing sugar
  • 50g butter, softened
To Decorate
  • Glacé cherries
  • 30g melted chocolate

Method

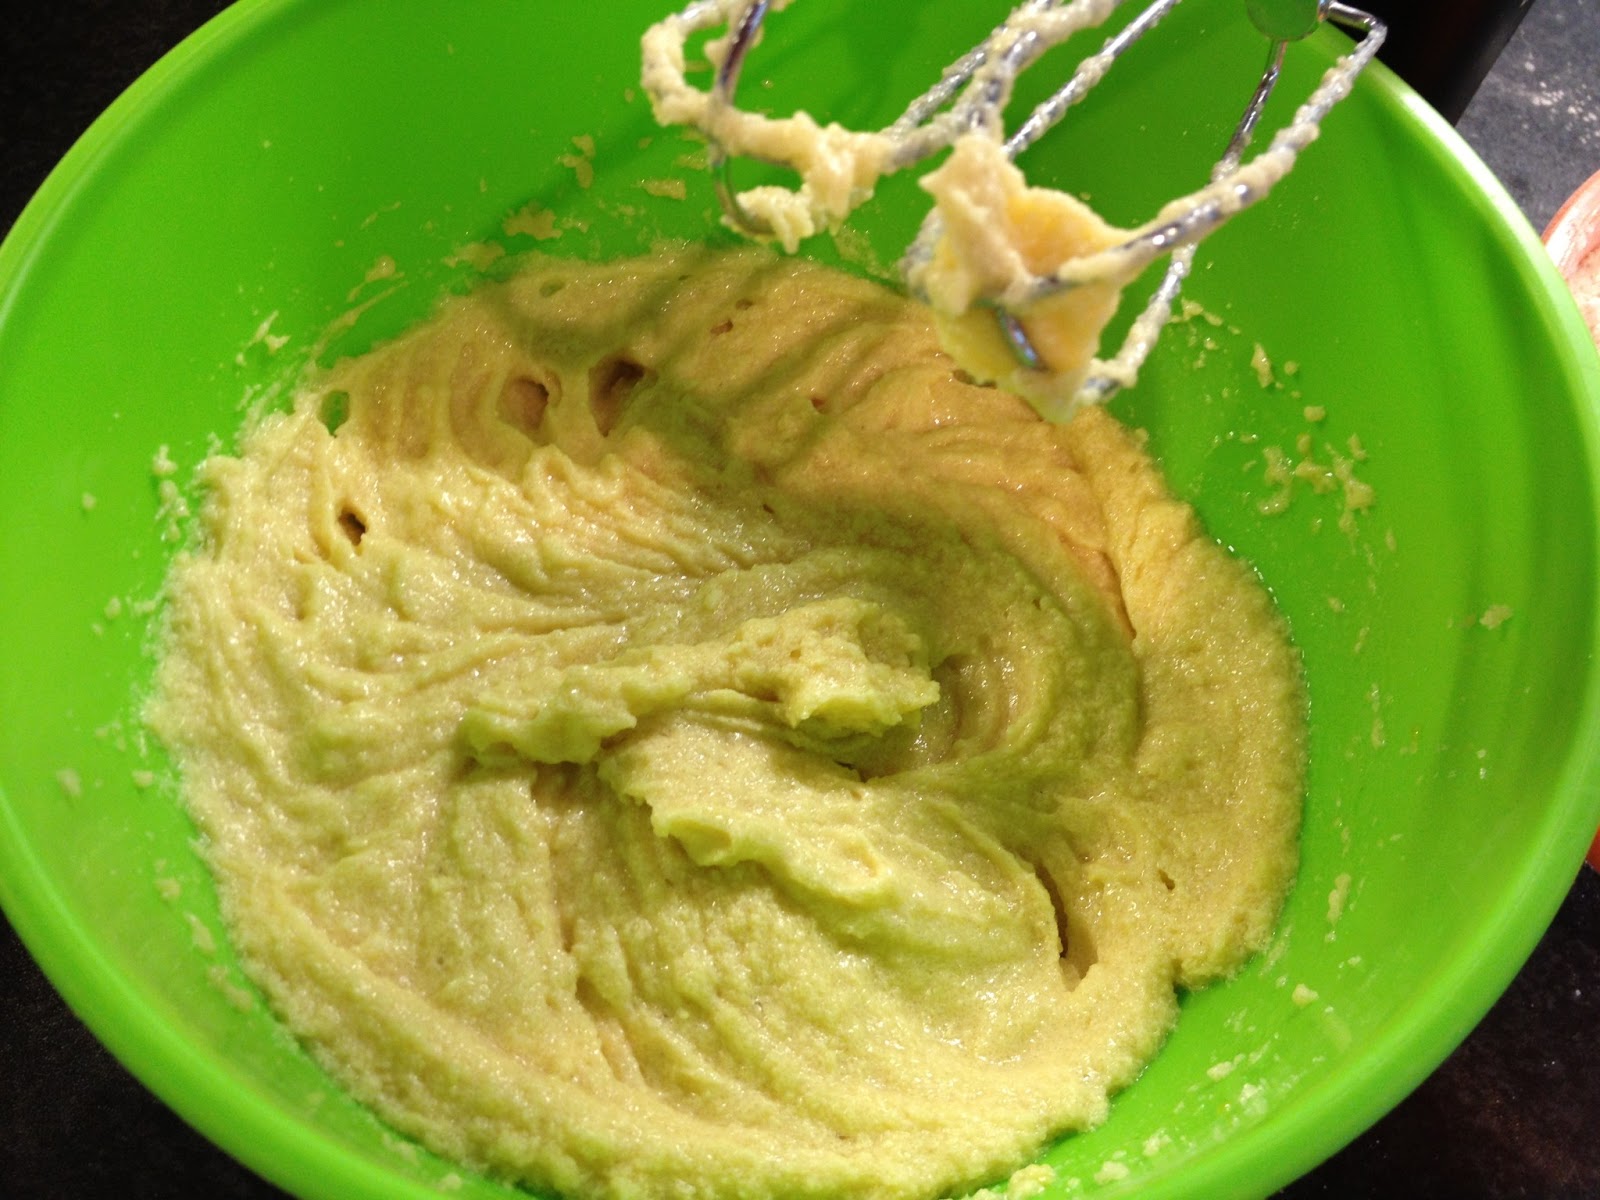
Start by making the pink cherry heart centre. Pre-heat the oven to 150 degrees. Line an 8 inch square cake tin with baking parchment leaving an overhang to make removing the sponge easier. In a large bowl, cream together the butter and sugar until light and fluffy. Lightly beat the eggs, and add to the mixture along with the cherry brandy. Beat together until combined. Sift in the self raising flour, and fold into the mixture. Finally add two to three drops of the food colouring, and mix well until you achieve a bright pink colour throughout the mixture.

Transfer the mixture to the lined tin, and take time to spread evenly into the corners of the tin. You want to avoid any uneven rise in the sponge. The mixture will spread thinly across the pan, we are aiming for a large flat surface of cake to cut shapes from. Place in the oven. The low temperature should allow the mixture to cook without colouring it too much on the crust. Bake for around 10 - 15 minutes until firm to touch, then remove from the oven. 


Whilst the sponge is still warm, use the baking parchment to lift it from the tin. Turn the sponge upside down on a chopping board, and peel away the baking parchment, revealing the soft underside of the cake. Use heart shaped cookie cutter to cut away 8 - 10 hearts from the sponge. Set aside on a cooling rack. (Make sure that the shape and size of the cookie cutter fits comfortably inside the loaf tin for the overall cake.)


Next step is to make the chocolate outside of the cake. Line a loaf tine with baking parchment and grease well. Turn the oven temperature up to 180 degrees. Cream together the butter and sugar, then add in the beaten eggs. Sift in the flour and cocoa powder and combine well. 

Spoon a few spoonfuls of the mixture into the bottom of the lined loaf tin. Then take the pink hearts, and line then up upside down in the tin. Work from the middle outwards and gently press them together to prevent the chocolate mixture spreading between them when baking. 


Fill the tin with the remainder of the chocolate mixture, being careful not to knock the hearts out of position. Make sure that you cover the tops of the hearts completely. Flatten the mixture over the tin evenly, as the top of the tin will become the bottom of the cake when served. 


Bake in the oven for 25 minutes, or until a skewer inserted into the cake comes out clean. Remove the tin from the oven, and place on a cooking rack. 

Meanwhile, make the chocolate ganache. Heat the double cream in a saucepan just until it starts to bubble. Turn down the heat, and add the chocolate pieces a little at a time, stirring throughout. The mixture should turn smooth and glossy. Add the cherry brandy and stir well. Set the mixture aside in a bowl until cool, and then place in the fridge to allow the mixture to firm up. It needs to be smooth enough to spread easily, but firm enough to hold shape and not run down the cake. 

Turn the cake out of the loaf tin, using the baking parchment to lift it out. Turn the cake upside down. You may need to use a knife to level off the top of the cake for it to sit flat, if so, be careful not to cut too deep as you don't want to cut any chunks out of the inner heart shape. 


Once the cake is cooled completely, and the ganache is the correct consistency, place the cake on a serving plate, and cover the cake completely with the ganache. Don't worry too much about getting a perfectly smooth finish, I deliberately wanted a more homely 'rough around the edges' look, just make sure that all of the surface of the cake is covered. Return the covered cake to the fridge to allow the ganache to set. 


Finally, it is time to decorate the cake. 

Start by melting the dark chocolate, either in the microwave carefully, or by tempering it over a bowl of hot water. Transfer it to a piping bag fitted with a number 2 nozzle. On a sheet of greaseproof paper draw a range of hearts to decorate the top of the cake. Again, I made these quite messy and rough. Set aside to cool and set. 


In a small bowl, mix together the ingredients to make the buttercream. Transfer the buttercream to a piping bag with a star nozzle fitted. Roughly pipe a row of roses along the top of the cake by placing the nozzle onto the cake and then spiraling outwards. Allow the roses to overlap each other. 


Finally, arrange the set chocolate hearts along the top of the cake, pressing them into the buttercream to stand upright. Alternate the hearts with glacé cherries. 


Now all that is left is to serve your cake, and enjoy the look of surprise on the face of your beloved when the inner pink heart is revealed! 


I am entering this cake into Calender Cakes, run by Laura at Laura Loves Cakes and Rachel at Dolly Bakes, where the theme is 'My Achey Cakey Heart', and Classic French hosted by Jen at Blue Kitchen Bakes, where the theme this month is Ganache.