Hi! Welcome to my blog. I am a major foodie, with a haphazard cooking philosophy, currently making that transition from cooking and baking for friends and family to 'wonder if I could make this my career'. Follow me for recipes, the outcomes of a few experiments, and general lovely foodiness. Opinions, reviews and recommendations are all my own.

Sunday 30 December 2012

When Two Become One: Cheesecake Topped Chocolate Brownies

This tray bake combines two of my favourite desserts, and I love that someone looked at a chocolate brownie, and decided that the best thing to do with it would be to cover it in another dessert. 

I have been wanting to test out this for a little while now, and as I have a party to cater for next week, I thought if I could master them they would make a great addition to the finger buffet. I have seen quite a few American recipes for Cheesecake Topped Brownies, however this time I have amalgamated my favourite brownie recipe, and added a simple baked cheesecake topping.

So, the ingredients needed are as follows;

For the Brownies

  • 115g Dark Chocolate, broken into pieces
  • 115g Butter
  • 300g Golden Caster Sugar
  • 1 tsp Vanilla Extract
  • Pinch of Salt
  • 2 Eggs
  • 140g Plain Flour
  • 2 tbsp Cocoa Powder
For the Cheesecake Topping
  • 200g Cream Cheese
  • 75g Golden Caster Sugar
  • 2 Egg Yolks
Line a 20cm square tin with baking parchment and grease.


Start by melting the chocolate and butter together over hot water, stir through until smooth. Add the sugar, vanilla extract and salt, and combine.


Beat the two eggs into the mixture.


Sift the flour and cocoa into a large mixing bowl.


Add the chocolate mixture to the flour, and fold through until well combined.


Keep a couple of large spoonfuls of the mixture aside for the top of the bake, and transfer the remainder to the greased tin, spreading out evenly to the edges.


In a separate bowl, beat together the cream cheese, caster sugar and yolks together until completely blended.


 Pour the mixture on top of the brownie mixture.


Add the remaining brownie mixture to the tin in random blobs, and then swirl through with a toothpick as below.


Bake for 30 minutes at 180 degrees, or until the top is a golden brown, and a toothpick inserted into the middle comes out clean.


Leave to cool and cut into small 1 inch squares.


Friday 28 December 2012

The Latest Pantry Door Cake Projects

So my little idea is nearly 4 months old now, and really starting to take shape. I had a look back through some of my first cake designs this week, and can't believe how far they have come on already! My beautiful friends and family have given me so many new and exciting tools and books for Christmas gifts this year, I cannot wait to get back into the kitchen and start baking, and I have some great ideas for 2013.

These are my last few designs of 2012...

1. 30th Birthday Literary Book Stack Cake

Book Cake
This cake was designed a few months ago for the 30th birthday of a friend's brother. The books have been personalised with his favourite titles and authors, and the three books concealed three separate flavoured cakes, one chocolate with dark chocolate ganache, one Victoria sponge, and one lemon.

2. 1st Birthday Butterfly Cake

My first official request 4 months ago! This was for a friend's little girl's first birthday, and I had one remit - Girly! The cake is a lemon sponge, with coloured lemon frosting. The decoration comes from edible gold paint, edible diamonds, and a sprinkling of edible pink glitter. I found the shaped mould on a fantastic site called Baked by Me - www.bakedbyme.net They really are fantastic, I would recommend anyone to check out their wares! 


3. Christmas Cake Project from Cake Decorating Class.

Christmas Cake
As you know I have been attending a sugarcraft class, this is the completed project from the end of the course. I have signed up for next year, and we will be learning orchids and lilies... I can't wait!

4. Panda Cake


This was a little bit of a home experiment, using a mould that came free with a magazine. I used vanilla and chocolate sponge mixtures, and piped the chocolate into the darker areas of the panda, before filling in with vanilla, and then used black and white sugarpaste to cover. The bamboo was made from wafers. 

5. Christmas Day Yule Log

And finally. this was the Yule Log I made to take to our big family Christmas dinner, decorated with holly and ivy...


Thursday 27 December 2012

Saved by the Cookie Dough

I am quite particular about my cookies. For me, as a bare minimum, they have to be chewy, those crunchy choc chip cookies that you buy in packets (mentioning no brand names!) just don't cut it for me. I spent years trying to find the perfect cookie recipe, and the best by far I ever came across was for Super-posh Chewy Cookies, from the Hairy Bikers - link here

http://www.bbc.co.uk/food/recipes/superposhchewycookie_89623

I adore this recipe, it has white and dark chocolate, cherries, hazelnuts and almonds, and a splash of cherry brandy and in my opinion it cannot be beaten.

My story today however comes from a couple of weeks ago, when I found myself in a (albeit brief) spell of austerity. I started a new job at the beginning of the month, and had to travel away for a few days for my induction. Having misjudged somewhat the dates of my last paycheck from my previous employers, and my first from the new, and then finding that I had pay my travel costs upfront, suddenly my purse was a little light.

I made some sandwiches to take on the train, and looked around the kitchen to see what else I could take with me to save myself from paying the inflated train station prices for snacks, but couldn't find anything. Then I spied a bag of chocolate chips in the corner of the cupboard. I grabbed a recipe book, had a flick through, and found a basic chocolate chip cookie recipe.

In short, these cookies were soft and chewy, exactly how I like them, and the recipe was straightforward, simple, and versatile. I replaced 15g of the flour with cocoa powder (I always use Green and Blacks Cocoa Powder as I find it has a deeper flavour) but you could also replace the chocolate chips with nuts or fruit if you wished.

I packed a bag full of cookies, and I'm not exaggerating when I say at 10pm at night on a train after having made two changes already, these little treats saved the last shred of my sanity!

The Recipe

225g butter
100g caster sugar
220g dark brown soft sugar
1 teaspoon vanilla extract
2 eggs
310g plain flour
1 teaspoon bicarbonate of soda
1 teaspoon salt
335g plain chocolate chips

Preheat oven to 190 C / Gas 5.

In a large bowl, cream together the butter and sugar until smooth. Beat in the vanilla and eggs one at a time. Combine the flour, bicarbonate of soda and salt; stir into the sugar mixture. Finally, mix in the chocolate chips. Drop heaped tablespoons onto ungreased baking trays.

Cookie Dough
Bake for 8 to 10 minutes in the preheated oven or until edges are golden. Remove from baking tray to cool on wire racks.

Double Choc Chip Cookies

Wednesday 26 December 2012

Gingerbread Recipe - Pantry Door Style

Quick post tonight - I wanted to share with you the recipe that I have been using for gingerbread this year, and a prime example of my 'kick-at-the-pantry-door' philosophy.

Earlier this year, after being bought a gingerbread house kit by my Grandma, I made a few batches of gingerbread, which proved to be quite successful (and reportedly quite spicy!). On Christmas Eve, whilst finishing my Christmas hampers for a few family members to open on Christmas Day, I decided to make one final batch to add to the boxes of goodies.

Happily humming Christmas tunes, I gathered my utensils, weighed out my ingredients, melted the butter, and reached for the golden syrup... only to find that rather than the required 300g, I had... 25g! It was 5pm on Christmas Eve, there was no way I was going to the supermarket, and I had a gingerbread-man shaped hole in my hampers. I tipped the cupboard out, feeling into the back of dark corners in the vain hope of finding a long-forgotten bottle, but to no avail, so I had to improvise.

I re-read my recipe, which calls for 300g golden syrup or treacle. I had black treacle. 100g of treacle in and I looked at the mixture forming with dismay, if I was to use 300g of black treacle, I had a feeling I was going to end up with tar biscuits. Then I spied a bottle of Orange Blossom honey in the cupboard. This is already ruined, I thought, what harm could it do?

In truth - both Gary and I agreed that they were the best batch yet! Just goes to show - don't be afraid of adding and substituting in recipes, they are after all just guidelines! I have posted the official recipe below... happy experimenting! xx

Gingerbread

180g Butter
125g Brown Sugar
300g Golden Syrup or Treacle
500g Plain Flour
1/4 tsp Salt
1 tbsp Ground Ginger
1/2 tsp Bicarb of Soda

Melt the butter over a low heat, then add the sugar, syrup and treacle. Remove from the heat and stir.

Combine the dry ingredients, then add to the syrup mixture, stirring until it forms a thick dough.

Transfer the dough onto a sheet of baking paper, and roll out to approx 1/2 cm thick. Cut out the shapes and remove the excess. Transfer the baking paper onto a baking sheet, and bake for 10 - 15 mins at 170 degrees. Remove from oven when shapes are firm to touch, they will continue to cook and firm up when out of the oven, so do not leave in for too long as they will be too hard and lose some of their chewiness.

Sunday 23 December 2012

Merry Christmas Everyone!

OK... It's Christmas Eve Eve (according to my Twitter feed) and I am at last sitting down to write a Christmas blog. You should probably know that I have four open drafts here, and a heart full of good intentions, however I realise now that I haven't actually uploaded a single word in December. This is not because of writer's block, it's not even because I have nothing to say, but more that so much has been happening that I simply did not know where to start!

Over the next few days I intend to share some baking experiments, a few tried and tested recipes, and the end results of a few long planned projects for some very special friends. Today however, before Christmas has been and gone completely, I wanted to share a few Christmas staples, and hope that a few of you may still yet benefit from the tips and links!

A few weeks ago, my Grandma took me Lakeland to buy Christmas presents (I was like a child in a sweet shop, seriously) and one of the treasures I brought home in my loot was a cookie cutter set for a gingerbread house. This little gem was just £4.99, and I have used the cutters over and over this Christmas, from shapes for icing cakes, to making a more festive shaped batch of cheese scones! This is the link, and comes thoroughly recommended by yours truly ... http://www.lakeland.co.uk/16675/Gingerbread-House-Cutter-Set

The box the set came in has a recipe on the back for gingerbread, and having never made it before, I used this and followed it to the letter to make my first batch of gingerbread. I made a batch of Christmas shapes, which have formed part of my Christmas hampers for friends and family, and decorated them with coloured royal icing. A lot of the blogs I have read over the last few weeks have all made a similar complaint, trying to find a red food colouring that does not come out pink when mixed with buttercream or royal icing. I have to say that the best by far is Sugarflair. You can find this in any good cake decorating shop, and is in small pots of gel. A small amount of this on the end of a cocktail stick is enough to produce a strong colour, and because it is a gel it doesn't affect the consistency of the substance you are adding it to.

These were my finished gingerbread shapes...

Gingerbread
Next up were my Christmas essential, Mince Pies. I always have to have these in the house, nothing gets me more in the Christmas spirit than a hot cup of tea and a mince pie, and I honestly cannot face the task of wrapping presents without the promise of this at the end. Up until now, honestly I always use shop-bought mincemeat, however I have made a promise to myself to try and make it homemade next year. I do try and make my mince pies stand out from Mr Kipling's (other makes are available...) and I always add ground almonds to my shortcrust pastry to give a special mince pie taste. This year, I found some cute Christmas stencils as well, and used these to decorate the tops of my mince pies with icing sugar.

Mince Pies
The almond shortcrust pastry recipe is as follows... Sift 200g plain flour into a large bowl, add 40g golden caster sugar, and 75g ground almonds. Stir the dry ingredients through until fully combined. Add 125g butter and rub into the mixture to create a breadcrumb like texture. Beat one free range egg and slowly add to the mixture, stirring well to bring the crumbs together to form a dough. Knead briefly and form into a ball, wrap in clingfilm and place in the fridge for at least an hour. This dough will make approximately 12 pies. Be warned, it make a very crumbly dough from the almonds, do not over handle and use flour sparingly to roll out so as not to dry it our further.

My third and final share for the day is my first attempt at a Yule Log, or Buche de Noel to give it it's Sunday name! I have had a couple of requests for Yule Log this year, and spent a little time researching various recipes to give myself a starting point. I settled on the Mary Berry recipe from the BBC Food website - http://www.bbc.co.uk/food/recipes/yule_log_15656

My only deviation from the recipe was I decided to swap the listed whipped cream centre for a chocolate mousse, which I made from melted chocolate and whisked egg whites. This was the end result, and it went down very well with my testers it has to be said - I now have to make another for the family for Christmas Day!

Buche de Noel : Yule Log
More recipes and photos to follow over the next few days, in the meantime, Merry Christmas all, I hope Santa brings you everything you wish for...

V xx

Monday 26 November 2012

The Quest For The Perfect Christmas Cake

There are many things that I am trying to turn my hand to this year, with Christmas Cake being high up on the list for a number of reasons. Firstly, I am hoping that (if and) when The Pantry Door starts to officially trade, I will be able to sell them. Secondly, because this year, I am hoping that they will be a key feature in my Christmas hampers for friends and family. And thirdly, but no less important, because you have to have Christmas cake, and it's about high time I learned to make one!


Because Christmas is steeped in tradition and recipes passed down from generation to generation, I decided against Google as my source of inspiration this time, and tried a more traditional approach... I asked my Mum. My Mum is a great baker, her cakes are legendary. So much so in fact that I remember at school whenever I took a slice of my Mum's cake in my packed lunch I would auction it off to the highest bidder! (Always safe in the knowledge that I could spend my 20p on whatever I chose, and still have a slice of delicious cake when I got home...)

So I phoned my Mum, expecting, to be honest, for her to pop over for a cup of tea, and then, with exaggerated secrecy present me with a faded brown page, passed down from the ages, containing the ultimate Christmas cake recipe. In reality, she brought me a ready measured Christmas Cake Kit from Tesco. True, it was endorsed by Mary Berry, but that's not really the point.

However I set about the task in earnest, and unpacked the bag of ingredients and the recipe card. I actually have to credit the brilliant simplicity of these kits. All the dry ingredients are measured, bagged and labelled in the kit, and all you need to add are butter, eggs, and citrus peel. The sheet gives you step by step instructions on making the cake mix, and the recipe and quantities are all written down so you can actually keep it for another year.

The Mary Berry endorsed Tesco Kit recipe is as follows;

210g dark brown sugar
210g butter
4 large eggs
1 orange
1 lemon
40g chopped almonds
10g black treacle
210g plain flour
3g mixed spice
833g soaked fruit mix (currants, raisins, sultanas, cherries, apricots, mixed peel and brandy)
10g apricot jam
200g marzipan
250g icing sugar

The method is surprisingly simple. Pre-heat the over to 140 degrees. Grease an 8 inch tin, and line the base and sides with baking parchment. Make a lid for the cake from parchment as well, and cut a small hole in the centre to let any steam from the cake escape during cooking.

Line Tins with Greaseproof Paper or Baking Parchment
Beat the butter and sugar together in a large bowl until creamy. Add the eggs, almonds, treacle, and the zest of the orange and lemon, and mix well.  Sift in the flour and mixed spice, and fold into the mixture. Add the soaked fruit, and combine well until evenly distributed through the mix.

Christmas Cake Mixture

Place the mixture in the prepared tins
The instructions said to bake for four and a half hours, but to do the skewer test after three and a half. I actually used a series of small cake tins to make my cakes, as I have plans to decorate them individually as gifts, so I checked my bakes after an hour, and they were pretty much done. I gave them an extra 20 minutes, and then put on a cooling rack. 


Tradition dictates now, that the cakes are wrapped in greaseproof paper and tin foil, and are fed with more brandy every couple of weeks until they are decorated for Christmas. I have made two batches, and the first are now coated in marzipan waiting for the final touches with the icing. I cannot wait to see my designs come to life!

All in all, I have to say that the Christmas Cake Kit was not such a bad idea, and actually I picked up another couple at the supermarket last week for £5 each, which, lets be honest, you would never manage to buy the individual ingredients for, and actually, you are still doing all of the cooking so it isn't really cheating... is it? I suppose, as always, the proof will be in the eating - I'll let you all know how it goes on Christmas Day!

V x

Saturday 17 November 2012

The Pantry Door's 'Saturday Experiment' Feature


It's becoming something of a feature in my life to have a Saturday Experiment each week - something that I have never made before that I have decided to try and master. I bought The Great British Bake Off book today - 'How to Turn Everyday Cakes into Showstoppers'. Having scanned through cover to cover already today, I can assure you that there will be many more Saturday Experiments to come! On a serious aside, I would recommend any aspiring baker to pick up a copy of this tome as soon as possible, as it is packed not only with great bake ideas, but brilliant tips for the basics, from buttercream to making praline, and how to cover and stack cakes. I have added the link to Amazon here, but I bought my copy from the local supermarket.
The Great British Bake Off: How to turn everyday bakes into showstoppers


http://www.amazon.co.uk/The-Great-British-Bake-Off/dp/1849904634/ref=sr_1_1?ie=UTF8&qid=1353175309&sr=8-1

Let's bring us back to today's Saturday Experiment however - today, I decided to try and master fudge. I decided this late last night as I was mentally drawing up a list of possible components for this year's Christmas Hampers, and was trying to focus on homemade/baked items that would be a little longer lasting over the Christmas period.

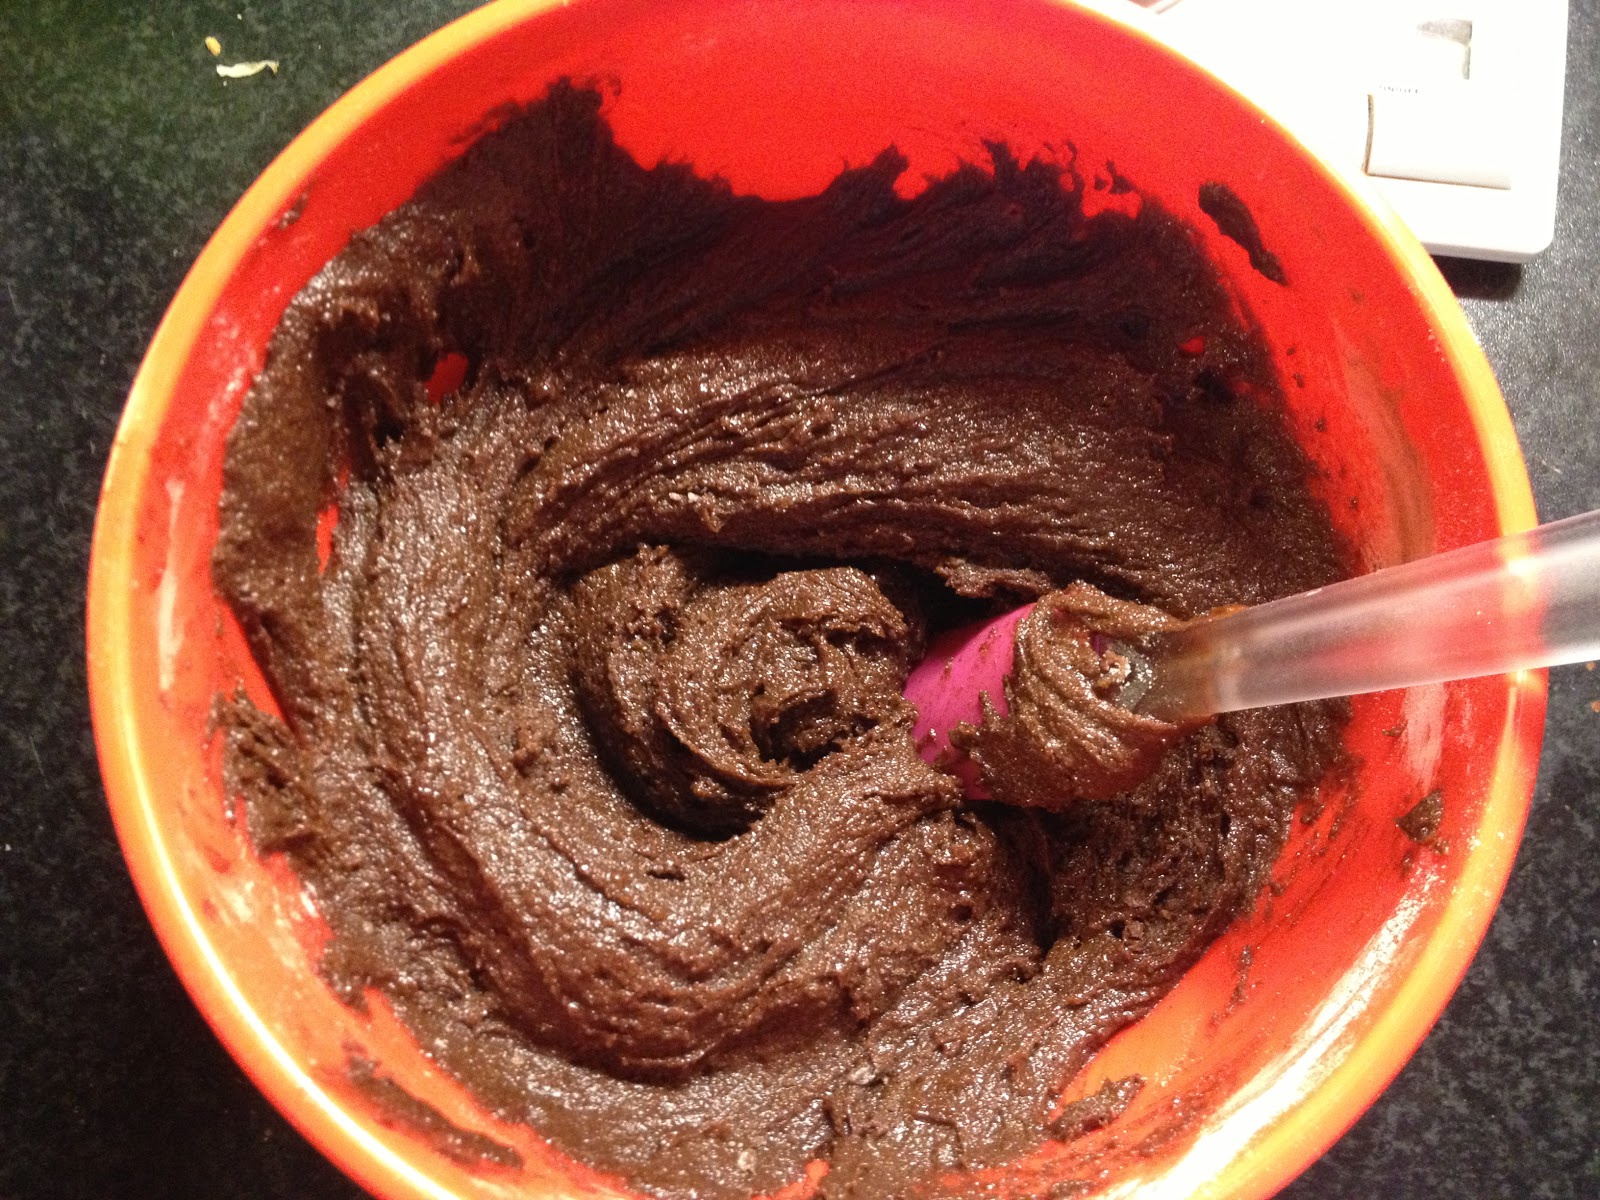
I should take a moment now to admit that I made batch one last night, using a recipe from a book I had at home. Still now I am unsure as to how and where I went wrong with this batch (the recipe incidentally was for a Black Forest Chocolate variety) however when I woke this morning and raced downstairs to unveil my creation, it had failed to set beyond a sort of gooey, crystallised, chocolatey mess.

I decided to cut back to basics, fudge apparently wasn't quite as easy as I expected, and went back to trusty Google to find a new recipe. The one I settled on in the end was on the Carnation website (as in the evaporated milk people). I note however that there are many many variations of recipes out there just for basic fudge before you even get into different flavours. Some call for milk, some double cream, some evaporated milk. And then again, some caster sugar, some demerara, and some golden. I think that fudge may take a series of experiments to find the best basic recipe, before I start trying to get creative with it.

Anyhow - here is the link to the recipe, and my step by step efforts...

http://www.carnation.co.uk/recipes/67/Ultimate-Fudge

So, the basic instructions are pretty simple, but I wanted to share what I learned in between each step... (the tricky bits they don't tell you!)

Start by weighing all the ingredients and putting them all into a heavy non-stick pan together. I would add, use as large a pan as possible, as the mixture expands quite a lot when on full boil, and cut the butter into small cubes first, rather than putting it in one block, as it will melt and combine with the other ingredients quicker.

Step One: Put all the ingredients in the pan
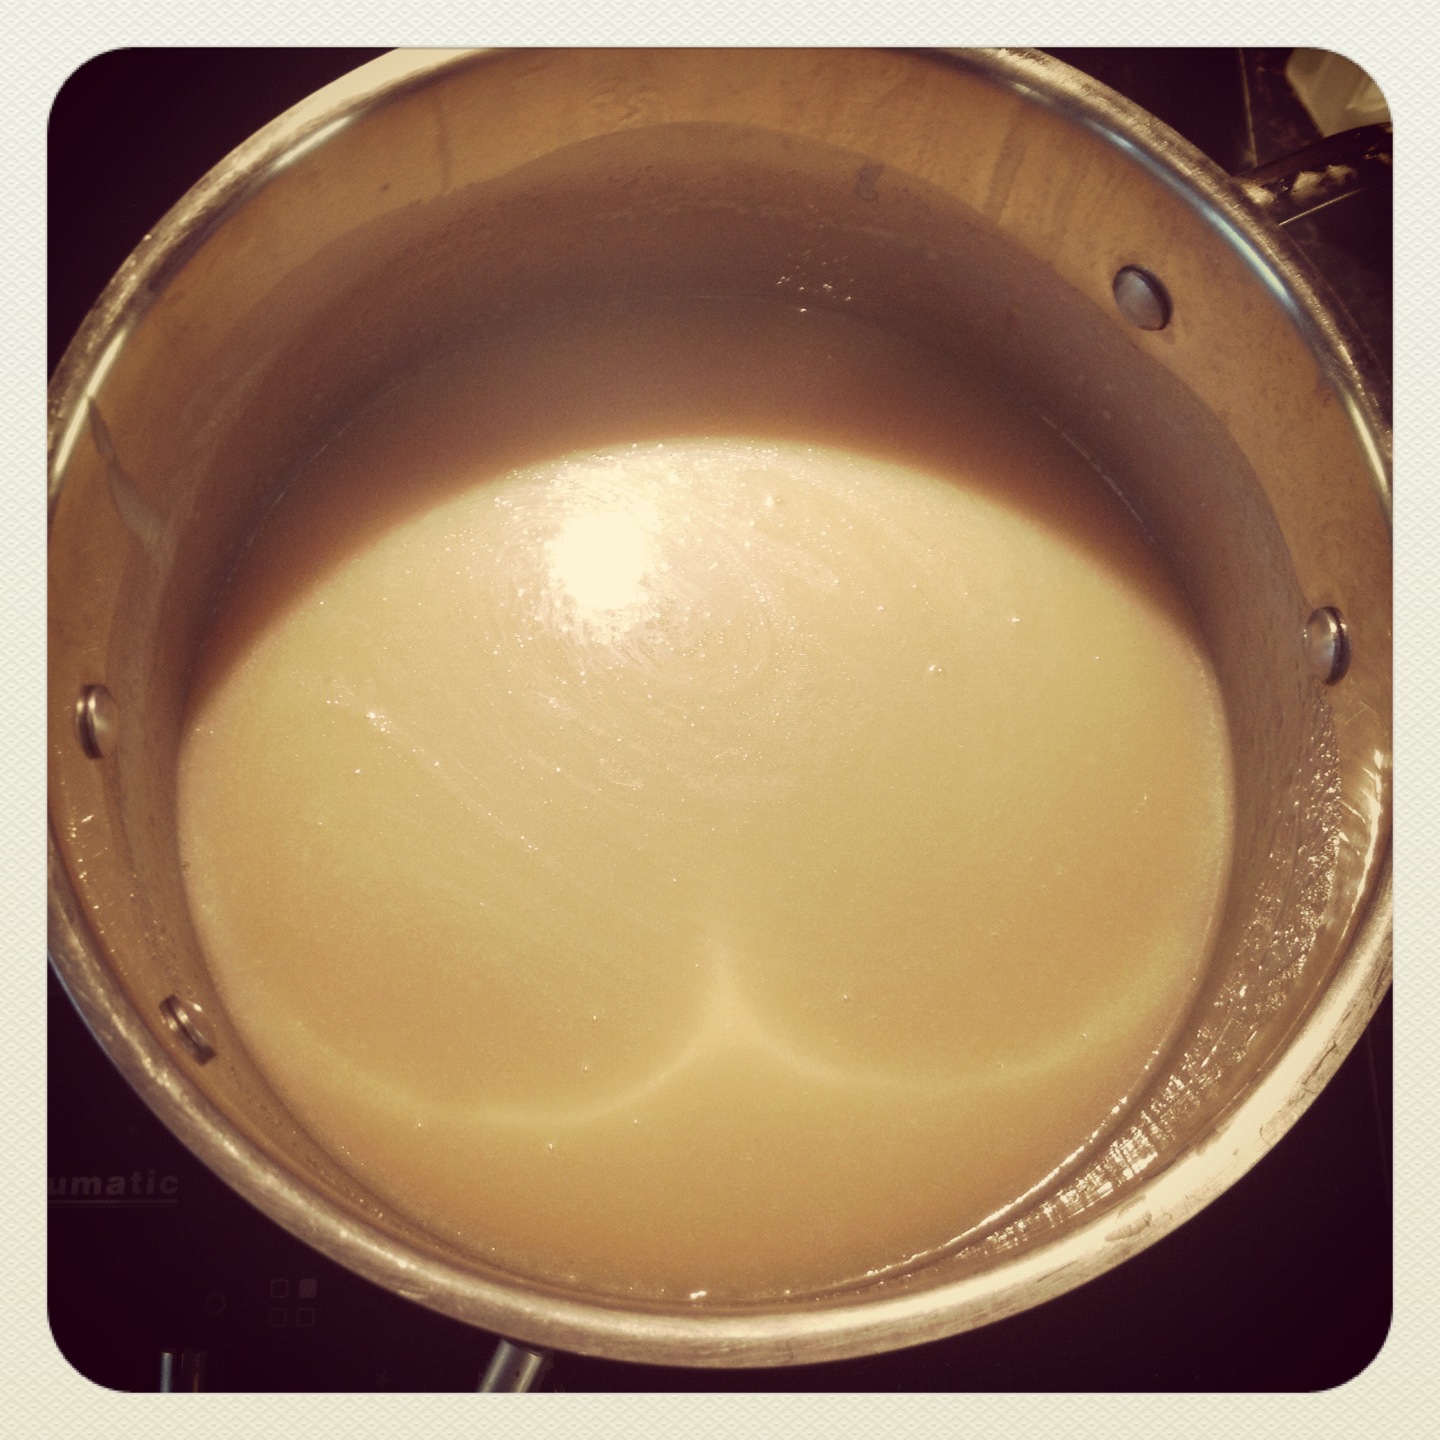
Gently heat the mixture, stirring constantly, until it reaches the consistency below.

Step Two: Gently heat until the sugar has dissolved
Now we bring the mixture to the boil. The Carnation recipe gives a method for testing the temperature of the fudge using a glass of cold water, but I would strongly recommend getting hold of a sugar thermometer if you can. Things I learned during this stage... 1) boiling fudge is very hot - whilst you need to stir this constantly, please keep your hands and fingers out of harms way as best as possible. 2) you need to keep stirring, and most importantly, scraping the bottom of the pan. I didn't quite do this enough, and ended up with a few little bits of burnt mixture in my fudge, which you cannot taste, but they do spoil the look. And 3) make sure you get to the 118 degrees specified, any less and you will not get the right consistency at the end.

Step Three: Boil to 118 degrees Celsius
Once you have reached the magic number, remove from the heat, and beat the mixture until it thickens. Try and do this away from the stove, and use either a whisk or a spatula. The mixture will start to cool, and thicken - keep scraping it away from the sides of the pan, otherwise you will loose half of your fudge as it sets to the pan (plus it will be a nightmare to clean later). You want the mixture to be just a touch thicker than the picture below, before transferring to a lined tin, and spreading evenly.


The beauty I found with this particular recipe, is that it does not require cooling overnight, and after a couple of hours it was firm enough to slice and enjoy with our afternoon cup of tea (whilst also enjoying Arsenal run rings around Tottenham!). It is quite a crumbly fudge, and whilst delicious, I think I will still try a couple more variations until I find my favourite.

The End Result: Creamy, Crumbly, Buttery Fudge
Now I have started this mission to master Fudge, I am reminded of a favourite little shop I used to frequently visit in Bath when I was at university, located just off the Abbey Square. The shop does nothing but fudge, in all the flavours you could ever want or imagine, and makes them right there in the shop front in full view of salivating tourists and onlookers. I looked them up online when I logged on tonight to remind myself of their glorious creations, and noticed they have an online shop now, and also sell a Make Fudge At Home Kit... Santa, if you're reading, I have been a very good girl this year... Check them out of you love fudge - http://www.fudgekitchen.co.uk

Tuesday 13 November 2012

The Only Muffin Recipe You Will Ever Need

It's been a little while since I posted a recipe up here, as I have been concentrating on my cake decorating and the projects I had promised friends. Tonight I wanted to share with you the easiest, most versatile muffin recipe you could wish for. I'm writing it tonight as I have sat here working most of the evening craving something sweet, and had nothing in the house to eat. I glanced upon a packet of chocolate chips in the back of the cupboard, and before I was really aware of what I was doing I found myself mixing flour and butter in a bowl...

I had a phase last year where I made muffins every week to take in the car for breakfast, and experimented with so many recipes and variations, breakfast muffins, oat muffins, chocolate, raspberry, blueberry, wholemeal, you name it! I adapted from a range of recipes, and this is the method that I settled on, it's quick, easy, and so so adaptable.

So, the ingredients list is;

380g self raising flour (or 355g and 25g cocoa powder if you want chocolate muffins)
100g butter
200g caster sugar (I always prefer golden caster sugar as it has a slightly more caramel flavour)
300ml milk
1 egg
...Plus 100 - 200g of whatever you want your feature ingredient to be - chocolate chips, blueberries, chopped dried apricots, cherries - the possibilities are endless!

Pre-heat your oven to 180 degrees, and line a bun tin with 12 muffin cases.

Start by sifting the flour into a mixing bowl, and adding the butter chopped into small cubes. With your fingers, rub the butter into the flour until you create a breadcrumb like texture. This usually only takes a minute or two.

Add the caster sugar to the flour, and stir until combined.

Beat the egg, and add to the milk. You may wish to add a teaspoon of vanilla extract at this point if it compliments the flavours in your muffins. Slowly poor the liquid mixture into the dry ingredients, and combine well until all the flour has been incorporated. Add your additional ingredients (fruit etc) to the mixture, stir through, and then divide into the 12 muffin cases.

Bake for 20 minutes, or until the muffins are a golden colour, and firm to touch. Remove from the oven, and place on a cooling rack.


And then dig in! These are delicious still warm from the oven with a cup of tea in the evening, as an easy breakfast on the go, or as a treat in packed lunches. Once they have cooled, 2 minutes in a warm oven will perk them up nicely.

The muffins I made tonight in the photo above are triple chocolate - with cocoa powder, and dark and white chocolate chunks mixed in. You really can go to town on mixing this recipe up however, here are some variations I have made in the past...

1. 150g fresh blueberries and a teaspoon of cinnamon
2. 100g fresh raspberries and 50g white chocolate chips
3. 50g chopped crystallised ginger and 50g chopped dried apricots
4. For a healthier breakfast option, try using a wholemeal self raising flour, and adding dried fruit and nuts
5. Replace the butter at the start of the recipe with mashed banana for a high fibre, low fat option, and add 100g chopped walnuts

I would love to hear any other ideas out there for new flavours for these muffins, please post below if you have any to share...

Vx


Sunday 11 November 2012

Cake School Progress Update

Back in September I signed up to a 10 week course in sugarcraft and cake decorating, run by the Worker's Educational Association (WEA) in Sheffield. I found the company by searching for cake decorating courses online, and they have been brilliant, they run all kinds of courses, you can check them out at www.wea.org.uk

I'm halfway through the course now, and the more I learn, the more I fall in love with cake decorating - which is a big deal for me considering just how short my attention span is! We have completed our first project, started a Christmas themed one, and I am already saving up to enrol on the next course.

For project one, we had to make a small arrangement of roses and carnations. As we were all beginners, we had to learn everything from the start, how use flower paste, how to colour it, shape it, and keep it from drying out. The arrangement we were making was held on wires, and over the week we have built up the components, as they have to dry between each element added.

Step One: Creating Stems and Buds
Step Two: Leaves
Step Three: First Layer of Petals
Step Four: Second Layer of Petals

The Completed Arrangement!
I never expected working with sugar paste could be so rewarding, and the possibilities are seemingly limitless. Working with flower paste is such a delicate task, however the results are amazing, and look so realistic! The flowers are totally edible, however we are taught to be careful about the wires in arrangements such as the one above, and advise 'clients' not to eat them.

I had a great opportunity to try a design with sugarcraft flowers last week when a friend asked me to make a birthday cake for her Mum. After looking at a few options, we decided to create a Cherry Blossom design on a Victoria Sponge cake. I have to say that the internet does provide a wealth of ideas for cake designs, and if you have a basic idea of something you want to achieve, you can get some really good inspiration online. I would add a note of caution however not to carbon copy designs you find online, as many professional cake decorators are very protective over the intellectual property rights of their designs.

Anyway, the idea I came up with was a simple, yet elegant ivory iced cake, with royal iced branches, and shaped cherry blossoms scattered across the surface.

Cherry Blossom Victoria Sponge Cake
I was particularly proud of the fondant icing on this cake, as I have struggled a little getting the icing smooth and even so far. I think I have now mastered the theory behind it, a few more practise attempts needed though I think before I can be totally confident. I suppose that means I have to make some more cakes... it's a hard life! ;-)

Vx

Saturday 10 November 2012

A Fond(ant) Trip Down Memory Lane

There are often things that you remember with a fondness, that, when you experience them again never quite live up to the memory. I remember French Fancies as a special treat, something that you only got at birthday parties, as they were too special for everyday. The only acceptable version was Mr Kipling's and oh! what a treat they were. Soft sponge cake, the sugar sweet iced coating, and the creamy buttercream topping. And so, I hope you understand my disappointment when I chanced upon these little beauties a few weeks ago, and with a now heightened sense of nostalgia, found the sponge to be mass produced and flavourless, the vegetable oil buttercream lacking, and the fondant icing overpoweringly sweet. 


I decided that this weekend's Saturday Experiment should be to try and recreate my childhood favourites, and set about the task in earnest this morning. I started out the way I often do these days - google, and found a range of recipes, which varied in their execution. I started by making a simple sponge cake for the centre, using my preferred method. I use a tip from an old friend, and measure out my eggs first, and then match the weight of butter, sugar and flour to them. Once all the ingredients are combined, I personally like to add a splash of milk to the batter to loosen it, as I find this makes a moister sponge when cooked. 

Once the cake was cooked and cooled, I sliced it into one inch squares, and topped each square with a blob  of buttercream. (Real, made with butter buttercream for that matter!) 

Now came the tricky part, coating each fancy with fondant icing. The trick I discovered, by trial and error, is getting the consistency of the icing just so, that it is fluid enough to move the sponge in easily to get the coating, but stiff enough so as it sets on the sponge rather than run straight off when on the cooling rack. Trust me, the whole process is a sticky, gooey, kitchen annihilating mess, saved only by a Mary Berry tip I read about securing the sponge pieces on a fork when coating in the fondant. 

The end result, although not as neat and uniform as Mr Kipling's I admit, I was really pleased with. The sponge is moist and buttery, the icing not as thick, and therefore not as over-powering. All in all, not bad for a first attempt, and enough to rekindle my love affair with Fondant Fancies. I just need a cup of tea now to wash them down! :)

Lilac Fondant Fancies


Sunday 4 November 2012

A Cake for All Occasions

It's Sunday night, and I'm wrapped up in the warm, with a tummy full of Black Forest Gateaux, and the muffled soundtrack of (slightly early) fireworks in the background, and I realise that I haven't posted on here for a couple of weeks. I make no excuse for this, it's been a crazy exhausting few weeks, however I haven't stopped baking, and have advanced my cake decorating skills somewhat. So I thought I would briefly bring you all up to date with the latest creations from The Pantry Door...

First was a gift for two very good friends of mine, who welcomed their second little boy into the world at the beginning of October, and I wanted to mark the occasion. This little lemon cake was decorated with a patchwork quilt, and adorned with teddy bears and little feet, and travelled over 200 miles to be eaten!

Patchwork Quilt Birth of Baby Cake

I have discovered an amazing You Tube channel recently called Cupcake Addiction Tutorials, it's by an Aussie girl who demonstrates the most amazing techniques, and explains them in such an easy and down to earth way. You can find her here http://www.youtube.com/user/mycupcakeaddiction?feature=results_main

I stumbled upon the channel looking for a tutorial on how to make buttercream roses on cupcakes, and found a great how-to to make stiletto cupcakes. Naturally I had to try both out, and these were the results!  


Next up were two actual orders for a friend, who had asked for a cake for Dad's 65th birthday, and then requested an additional cake for a 3 year old boy. After consulting with her, we decided that the Dad cake would be themed around wine, and the little boy's around rockets. Considering my lack of drawing skills, I sketchily tried to explained to her my design ideas, with little support from my illegible doodles. In my minds eye, I had designed a wooden cask shaped cake, draped in grapes, and labelled with the vintage year of her Dad, and a star spangled space cake with a rocket aimed for the moon. I cannot thank her enough for trusting me to bring these ideas to life! The wine cask is a four layered lemon sponge with lemon curd and buttercream, whilst the rocket cake is chocolate with a ganache centre.

'Shoot for the Moon' Rocket Cake


Vintage Red Wine Cask Cake - with Fondant Grapes

Just when I thought I might be able to hang my apron up for a few days, Gary forlornly reminded me that the house had smelled of cake for days, and he hadn't been able to even taste a sample. I had been wanting to test out James Martin's recipe for Cola cake for a while, so decided to use the opportunity, and make a cheeky little cake to tuck into at home...

'Monster-in-a-Box' Cola Cake

I'm off to wash the dishes now! Baking resumes tomorrow night! V x :-)

Tuesday 16 October 2012

If In Doubt - Make Soup

When I talk about a kick at the pantry door, the absolute essence of the philosophy is that moment when, for any one of a number of reasons, you find yourself in the kitchen, with all your cupboard doors ajar, the fridge door wide open, and you are asking yourself what on earth to make for dinner. Maybe it's not quite payday. Maybe you have neither the time nor energy to get to the shops. Maybe, as often happens in our house, you have a mixture of half used packages and leftovers that don't quite know how to assemble themselves into a proper meal.

Whenever this happens in my house, I make soup. Soup is one of the most under-rated, healthiest, lowest in calories, tastiest, and absolute easiest things in the world to make. It needs no recipe, culinary expertise, little time to make, and its possibilities are endless. I use one simple rule when I make soup - the volume of liquid must slightly outweigh the weight of the solids, normally 500g mixed vegetables to 700ml stock.

Today I made a soup from a bag of sweet potatoes that needed using up. I used a chicken stock cube to make my stock, and added to it the sweet potatoes peeled and chopped, three sweet peppers that were close to their best, and a generous helping of thyme. I left the pan to simmer for an hour whilst I got on with my chores, and returned when the vegetables had softened to the point that they were starting to break up. I added half a bag of spinach that was sitting in the fridge, cooked it through and then blended until smooth.


Gary and I enjoyed big steaming bowlfuls for lunch, with piles of buttered bread, and the remainder has been divided into individual pots and frozen, so that we can defrost and cook a single portion whenever the mood takes. This also makes a cheap and easy healthy lunch option if you work in a place where you have access to a microwave.

Making soup like this, the possibilities are endless, these are some of my favourite options;

Spicy Vegetable
Start by frying a chopped garlic clove and a fresh chilli, then add the stock and vegetables. If you do not have a fresh chilli, 1 tsp of dried chilli flakes could also be used. Butternut Squash or Parsnips are ideal flavours to compliment the spice.
Smoky Bacon and Lentil
Start by frying chopped onions and bacon in a little oil until golden, then add the remaining vegetables, potatoes, and red lentils. Then add the stock.
Chicken and Vegetable
Follow the recipe above, adding 200g cooked chicken. Leftover meat from a Sunday Roast is perfect, alternatively grill 2 chicken breasts, dice and add to the soup before blending.

I would love to hear some of your variations or favourite soup recipes, please post below!

Enjoy! V x